Yes, a trip to the McArthurGlen Designer Outlet during a 4-hour layover is technically possible, but only if executed with military precision and an understanding that your actual shopping time will be approximately 90 minutes.
- Success depends entirely on using the Canada Line train, as it bypasses all road traffic.
- Your “4-hour” window is drastically reduced by non-negotiable time costs like deplaning, walking, and re-clearing security.
Recommendation: To avoid missing your flight, you must be back on the train heading to the airport no later than 2 hours and 15 minutes after your flight has landed at the gate.
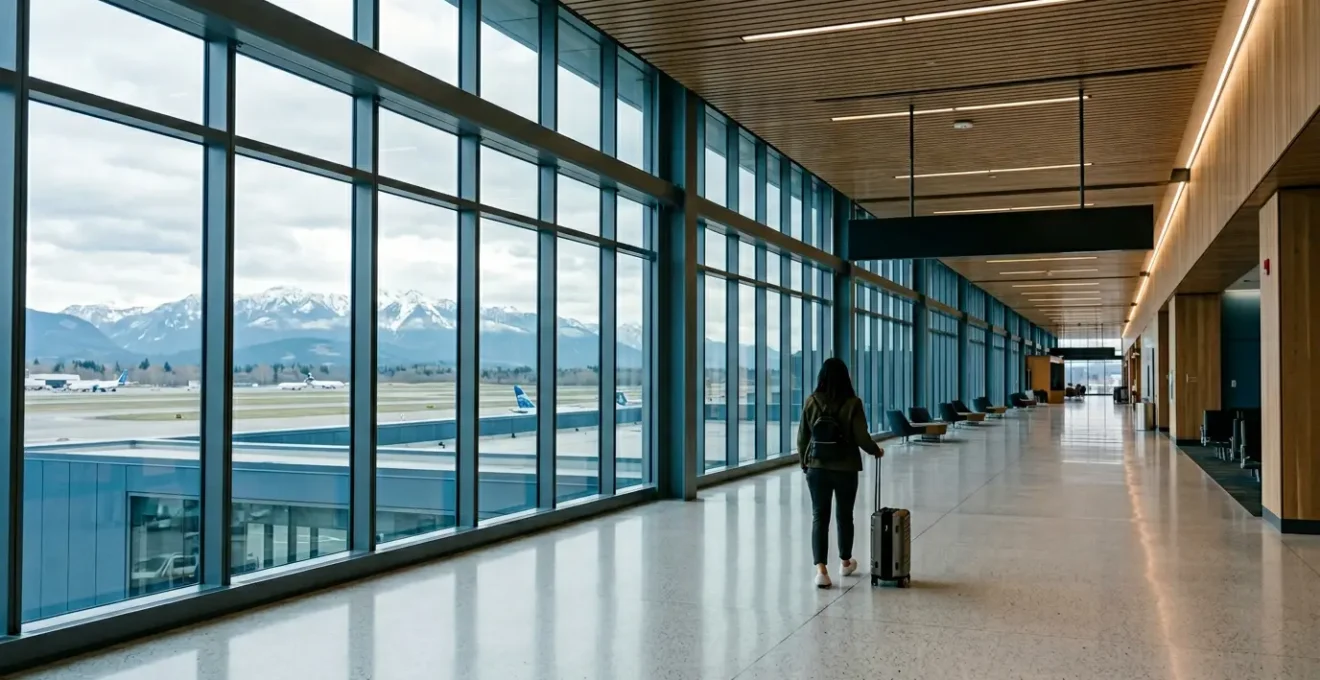
The sight of the McArthurGlen Designer Outlet from your airplane window as you land at Vancouver International Airport (YVR) can feel like a taunt. It’s right there, a village of bargains just beyond the runway. For the transit passenger facing a 4-hour layover, the question is immediate and urgent: is it a feasible mission or a fool’s errand? Standard advice often suggests it’s a simple train ride away, but this overlooks the critical, time-consuming realities of airport logistics. A 4-hour layover is not 240 minutes of free time; it’s a shrinking budget of minutes eroded by taxiing, deplaning, navigating the terminal, and the all-important security clearance on your return.
This guide abandons generic suggestions in favour of an operational plan. We will treat your layover not as a leisurely break, but as a time-sensitive logistical challenge. The key to success lies not in hoping for the best, but in understanding the exact, non-negotiable time costs involved. Forget wishful thinking; this is a minute-by-minute breakdown to determine if you can execute an outlet run and, more importantly, make it back to your gate before the boarding call. We will dissect the timeline, weigh your options, and provide the data-driven clarity needed to make a smart, stress-free decision. Your time is the most valuable currency you have at YVR, and we’ll show you exactly how to budget it.
This article provides a detailed operational breakdown for your YVR layover. The following summary outlines the key logistical decisions you’ll face, from quick activities within the terminal to critical transportation choices for ventures outside the airport.
Summary: Your YVR Layover Decision Matrix
- The Observation Deck: Where to Watch Planes Take Off Inside the Terminal?
- Japadog or Globe@YVR: Where to Eat Before Security?
- The Fairmont In-Terminal: Is It Worth Booking a Day Room for a 6-Hour Layover?
- US Pre-Clearance: Why Must You Arrive 3 Hours Early for Flights to Seattle?
- Ice Wine Prices: Is It Cheaper to Buy at YVR Duty-Free or a Liquor Store?
- Waterfront Station Confusion: Which Platform Leads to the Airport?
- The Takeoff Noise: Is a Harbour View Room Too Loud in the Morning?
- Canada Line vs Uber: Which Is Faster to Downtown During Rush Hour?
The Observation Deck: Where to Watch Planes Take Off Inside the Terminal?
For passengers with a shorter time budget or less appetite for risk, the YVR Observation Deck offers a compelling, low-stress alternative to leaving the airport. However, it’s crucial to understand its location to properly calculate your time. The deck is situated landside, meaning you must exit the secure departures area to access it. A key detail for time-crunched travellers is that it is located in the Domestic Terminal on Level 4 and is free to access. This means if you are on an international or US-bound layover, you must account for the walk between terminals and, most importantly, the time required to re-clear security upon your return to your departure gate.
While a fantastic spot offering expansive views of runway operations against the stunning backdrop of the coastal mountains, it is not a “quick peek” activity. A realistic time budget would be 45-60 minutes, including walking, viewing, and the security buffer. It provides a dose of the iconic Vancouver scenery without the logistical gamble of a full airport exit, but the “landside” nature of the deck is a non-negotiable time cost that must be factored into your plan. For those with less than two hours, this remains a far more practical option than an outlet run.
Japadog or Globe@YVR: Where to Eat Before Security?
Choosing where to eat on a layover is a decision dictated entirely by your time budget. YVR’s landside area offers options at both ends of the speed spectrum, from iconic street food to upscale dining. Your choice between a quick bite like Japadog and a full-service meal at Globe@YVR depends on how many minutes you can afford to spend. A fast-casual option like Japadog or Tim Hortons requires a minimal time investment; you should allow 15-20 minutes total for ordering and eating. This is the ideal choice for travelers with a tight connection or those saving time for other activities.
In stark contrast, a sit-down restaurant experience demands a significantly larger time commitment. As detailed in their overview, Globe@YVR at the Fairmont Vancouver Airport offers Pacific Northwest cuisine with panoramic runway views, providing a tranquil escape from the terminal’s bustle. However, this luxury comes with a time cost. To properly enjoy a full-service meal here, you must reserve a minimum of 60-75 minutes. This makes it a viable option only for passengers with extended layovers (3+ hours) who are not planning other excursions. For anyone on a 4-hour clock with plans to leave the airport, a quick-service meal is the only strategically sound option.
The Fairmont In-Terminal: Is It Worth Booking a Day Room for a 6-Hour Layover?
When your layover extends beyond the 4-hour mark to six hours or more, a new set of possibilities emerges, chief among them being the Fairmont Vancouver Airport’s in-terminal day rooms. This option pivots from a rushed shopping trip to a moment of genuine rest and luxury. The hotel offers day rooms available for 4, 6, or 8 hours between 8:00 AM and 7:00 PM, providing a soundproofed sanctuary with runway views and access to the hotel’s health club and spa. However, the crucial question is whether the “usable time” justifies the cost.
A 6-hour layover does not translate to 6 hours in a room. After deplaning, navigating the airport, and checking in, your actual usable time is closer to 3 hours. This is where a cost-benefit analysis becomes essential. The following data provides a clear comparison of how you might spend a 6-hour layover.
| Option | Estimated Cost (CAD) | Actual Usable Time | Key Benefits |
|---|---|---|---|
| Fairmont Day Room (6 hours) | $310+ | 2.5-3 hours (after deplaning, re-clearing security, boarding prep) | Soundproofed luxury, runway views, spa access, in-terminal convenience |
| Taxi to Steveston Village + Activity | $70-100 (taxi round-trip) + $20-40 (activity/meal) | 2-3 hours exploration time | Authentic local experience, waterfront charm, cultural immersion |
| Canada Line to McArthurGlen Outlet + Shopping | $18.50 (transit round-trip) + personal shopping budget | 2.5-3.5 hours shopping time | Designer brands, outdoor experience, significant cost savings on transit |
Ultimately, the decision is a personal one based on priorities. As this comparative analysis for YVR shows, the day room is the premium choice for privacy, quiet, and recovery. For travelers prioritizing value or local experience, a trip to the outlet or a nearby area like Steveston offers more activity for a lower cost. For a 6-hour layover, the day room is a valid, albeit expensive, luxury. For a 4-hour layover, it is logistically impractical.
US Pre-Clearance: Why Must You Arrive 3 Hours Early for Flights to Seattle?
For any traveler connecting through YVR to the United States, the U.S. Pre-Clearance facility is the single most significant factor in your time-planning. It is not merely an extra security check; it is a full-fledged U.S. border crossing conducted on Canadian soil. The recommended 3-hour arrival time for U.S. flights is a direct consequence of this multi-step process, which handles an immense volume of passengers. This process is a major operation, with U.S. Customs and Border Protection (CBP) data demonstrating the scale of the preclearance program, which processed over 22 million travelers in 2025 alone.
Unlike a domestic or standard international departure, you must complete both Canadian security (CATSA) and U.S. customs and immigration (CBP) before you even reach your gate. This dual process is what consumes the bulk of the time. You are essentially arriving in the U.S. before you depart, meaning your flight from YVR to Seattle lands as a domestic arrival with no further checks. This convenience upon landing comes at the cost of a significant time investment before departure. During peak travel times, queues at both CATSA security and the CBP checkpoints can be substantial, making the 3-hour buffer a necessity, not a suggestion.
Your Action Plan: Navigating the YVR US Pre-Clearance Process
- Check-in & Bag Tag: First, check in with your airline and get your bags tagged. Do not proceed anywhere else until this is done.
- Bag Drop/Scan: Immediately take your checked luggage to the designated large-scale CBP scanner right after the check-in counters.
- CATSA Security: Proceed through the Canadian Air Transport Security Authority (CATSA) checkpoint. Be prepared for standard security screening.
- Customs Declaration: Complete your U.S. customs declaration form at an automated kiosk or prepare to speak with a CBP officer.
- CBP Officer Interview: Have your passport and boarding pass ready for a brief interview with a CBP officer, who will grant or deny entry.
Ice Wine Prices: Is It Cheaper to Buy at YVR Duty-Free or a Liquor Store?
For travelers looking to bring home a bottle of iconic Canadian ice wine, the question of where to buy it involves a classic trade-off: convenience versus cost and selection. YVR’s Duty-Free shops offer the undeniable advantage of being located post-security, making for a simple, last-minute purchase. However, this convenience often comes at a premium, and the selection is typically curated for tourists, focusing on a few major brands rather than the full breadth of local offerings.
The alternative is to purchase from a government-run BC Liquor Store, but this requires leaving the airport. As a provincial entity, BC Liquor Stores feature standardized pricing across all locations, meaning the price you see online is the price you’ll pay in-store. This eliminates price variation and is generally lower than airport prices for the same product. More importantly, these stores offer a vastly superior selection, including boutique ice wines from the Okanagan Valley that you will not find at the airport. The verdict is clear: if you have the time to leave the airport (a layover of 5+ hours), a trip to a BC Liquor Store will yield better prices and a far more authentic selection. If you are on a tighter schedule, the Duty-Free is your only practical option, and you will pay a premium for that convenience.
Waterfront Station Confusion: Which Platform Leads to the Airport?
For travelers starting their journey from downtown Vancouver, Waterfront Station is a major transit hub where three SkyTrain lines converge, creating a point of potential confusion. Finding the correct platform for the Canada Line train to YVR is crucial for a stress-free airport transfer. The key is to ignore the signage for the Expo and Millennium Lines. The Canada Line operates on a separate, subterranean level. Upon entering Waterfront Station, you must look for the distinct blue Canada Line signage and go down the escalators or stairs from the main concourse.
Once on the Canada Line platform, the final critical step is to check the destination displayed on the front of the approaching train. The line splits at Bridgeport Station, with trains alternating between ‘YVR-Airport’ and ‘Richmond-Brighouse’. You must board a train explicitly marked ‘YVR-Airport’. Boarding a Richmond-bound train by mistake is a common error, but easily fixed: simply exit at the next station (Bridgeport), cross to the other side of the same platform, and wait for the next YVR-bound train. This quick recovery adds only 5-10 minutes to your trip, but paying attention at Waterfront avoids the issue altogether. This system is designed for efficiency, making it the most reliable airport connection with a travel time of under 30 minutes.
Checklist for a Foolproof Trip from Waterfront to YVR
- Find the Blue Signs: At Waterfront Station, exclusively follow the blue signage for the Canada Line.
- Go Down: Take the escalators or stairs down to the underground Canada Line platform.
- Verify Train Destination: Look at the electronic display on the train’s front. Board ONLY if it says ‘YVR-Airport’.
- Know the Recovery Plan: If you accidentally board a ‘Richmond-Brighouse’ train, get off at Bridgeport Station and cross the platform to catch the next YVR train.
The Takeoff Noise: Is a Harbour View Room Too Loud in the Morning?
Travelers staying in a downtown Vancouver hotel with a harbour view often wonder about morning noise from aircraft. A common misconception is that this noise originates from jets at YVR, located 15 kilometers away. In reality, the signature morning soundscape of Coal Harbour comes from a much closer and more iconic source: the seaplanes of Harbour Air and Seair. These floatplanes, a vital part of Vancouver’s transportation network, begin their operations from the harbour terminal around 7 AM.
The sound of their engines and propellers is distinct from that of a commercial jet and is an integral part of the city’s working waterfront atmosphere. For some, it’s a uniquely Vancouver “alarm clock”; for very light sleepers, it could be a disturbance. As noted by travel experts, the noise is an authentic part of the local experience that connects the city to the coastal communities. If noise is a primary concern, requesting a higher floor or a room on the opposite side of the hotel is an effective mitigation strategy. However, for most visitors, watching the seaplanes take off against the backdrop of Stanley Park and the North Shore mountains becomes a memorable part of their stay, far from being a nuisance.
Key Takeaways
- The Canada Line is the only transportation method that guarantees a predictable travel time to and from YVR, bypassing all road congestion.
- U.S. Pre-Clearance is a multi-step border crossing process; a 3-hour buffer before your flight is not a suggestion but a necessity.
- A 4-hour layover realistically translates to only 90-100 minutes of “free time” after accounting for all airport procedures.
Canada Line vs Uber: Which Is Faster to Downtown During Rush Hour?
During Vancouver’s weekday rush hour (approximately 3:30-6:30 PM), the choice between the Canada Line SkyTrain and a ride-hailing service like Uber is not a choice at all—it’s a clear-cut decision in favour of the train. While Uber offers door-to-door convenience, it is subject to the severe traffic congestion that plagues the bridges and arterial routes connecting the airport to downtown. A trip that takes under 30 minutes in off-peak hours can easily stretch to 40-60 minutes or more during peak traffic.
The Canada Line, by contrast, operates on a completely separate, dedicated guideway. It is immune to traffic, accidents, and rush hour delays. Its travel time remains a consistent under 30 minutes regardless of the time of day. While the upfront cost includes a YVR AddFare, the total price is significantly lower and more predictable than an Uber, which is subject to surge pricing during high-demand periods. In the future, this cost will change, with a recent decision confirming the YVR AddFare increases to $6.50 on July 1, 2026, but the time-saving principle remains the same.
The definitive data on this choice makes the decision straightforward for any time-conscious traveler.
| Transportation | Rush Hour Time (3:30-6:30 PM weekdays) | Off-Peak Time | Cost (CAD) | Best Use Case |
|---|---|---|---|---|
| Canada Line SkyTrain | Under 30 minutes (consistent) | Under 30 minutes | $9.00 (base fare $4.00 + YVR AddFare $5.00) | Speed during peak hours, cost savings, predictable schedule, solo/duo travelers |
| Uber/Lyft | 40-60+ minutes (severe bridge congestion) | 27-30 minutes | $35-50+ (varies with surge pricing) | Heavy luggage, groups of 3+, late-night arrivals after train stops (past 1 AM) |
| Taxi | 40-60+ minutes (same traffic delays) | 30-35 minutes | $40-55+ | Direct door-to-door service, passengers uncomfortable with public transit |
The only scenarios where an Uber or taxi holds a strategic advantage are for groups of three or more (where the cost per person becomes competitive), travelers with excessive luggage, or for arrivals after 1 AM when the Canada Line has ceased operations for the night. For speed during rush hour, the Canada Line is the undisputed champion.
With this operational knowledge, you can now make an informed, time-critical decision for your YVR layover. The next step is to set a timer on your phone the moment you deplane and execute your chosen plan with precision, ensuring you are back at your gate with time to spare.