The SeaBus is not just a ferry; it’s a strategic sightseeing tool that, for a single transit fare, offers a better water-level perspective of Vancouver’s skyline and mountains than many expensive tours.
- The key is leveraging the 90-minute transfer window to create a multi-attraction “Surf & Turf” loop.
- Knowing system constraints like evening frequency and bike rules prevents frustration and unlocks new opportunities.
Recommendation: Use the SeaBus as a connector, not just a destination, by planning a trip that combines the ferry ride with the Stanley Park Seawall and North Shore’s Spirit Trail.
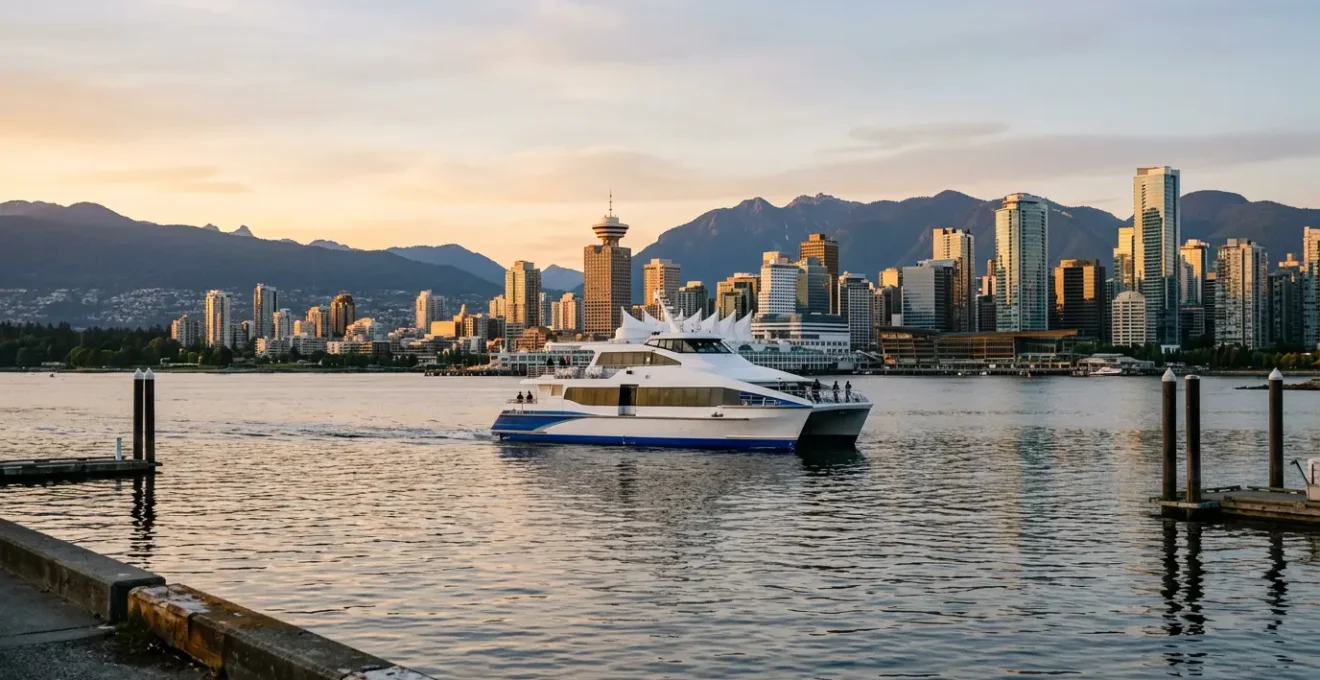
For budget travelers staring across the Burrard Inlet, the question is compelling: Can a simple $4.50 public transit ride truly double as a world-class sightseeing cruise? The iconic blue and white SeaBus shuttles between downtown Vancouver and the North Shore, and many wonder if it offers the same million-dollar views of the skyline, Canada Place, and the mountains as the dedicated tour boats that charge ten times the price. The ride itself is a swift 12 minutes, but its value isn’t measured in time, but in perspective.
Most guides will give you the simple answer: “Yes, it’s a cheap way to see the city.” This is true, but it misses the entire point. Treating the SeaBus as just a cheap ferry is like using a smartphone only for calls; you’re ignoring 90% of its power. The real value isn’t in the ride itself, but in understanding how to leverage it as a strategic piece within the larger TransLink system. The secret lies not in simply boarding the boat, but in mastering its schedule, its connections, and its unique place in Vancouver’s geography.
This guide reframes the SeaBus not as a destination, but as a powerful connector. We’ll move beyond the obvious “the views are nice” and dive into the specific hacks and strategies that transform a commuter vessel into the cornerstone of a perfect, low-cost Vancouver exploration day. We will explore its operational quirks, how to seamlessly connect to other iconic attractions, and ultimately, how to extract the maximum possible value from your single transit fare.
This article provides a complete strategic overview for leveraging the SeaBus. The table of contents below outlines the key system rules and opportunities we will cover to help you plan your journey.
Summary: The SeaBus Dilemma: Commuter Ferry or Vancouver’s Best-Value Sightseeing Cruise?
- The 15-Minute Frequency: Why Missing the SeaBus at Night Means a Long Wait?
- The Rush Hour Ban: When Can You Not Take Your Bike on the SeaBus?
- The Market at the End of the Line: Is Lonsdale Quay Worth the Trip?
- Bus 236: Where to Catch the Connection to Grouse from the SeaBus Terminal?
- Front or Back: Which End of the SeaBus Has the Best City Views?
- Prospect Point or Ambleside: Which Angle Shows the Bridge and Ocean Best?
- Waterfront Station: How to Connect from Canada Line to SeaBus?
- Stanley Park Seawall: How to Ride the One-Way Path Without Getting Fined?
The 15-Minute Frequency: Why Missing the SeaBus at Night Means a Long Wait?
During the day, the SeaBus is a model of efficiency, with two vessels creating a convenient 15-minute service. This rhythm makes planning easy; if you miss one, the next is just a short wait away. However, the savvy travel hacker knows that this frequency is not constant. After 9:00 PM, the service changes dramatically. One vessel is taken out of service, and the wait time between sailings doubles. Missing a boat at night means you’re waiting for a full 30 minutes between evening sailings, a significant delay that can throw off your plans.
For a budget traveler, this 30-minute wait isn’t a disaster; it’s a planning parameter. Knowing this rule allows you to either ensure you arrive on time or, even better, incorporate the potential wait into your itinerary. Instead of staring at the clock, you can use that time for a mini-adventure at either terminal. For instance, a 30-minute buffer at Waterfront Station is enough time for a quick walk to see the historic Gastown Steam Clock. At Lonsdale Quay, it’s a perfect window for a drink on a waterfront patio, turning a potential frustration into a planned, enjoyable part of the evening.
This frequency shift is a prime example of why understanding the operational rhythm of the transit system is crucial. It’s the difference between a smooth, seamless experience and a frustrating, time-wasting one. Always check the last sailing times, especially on weeknights, to avoid getting stranded or having to pay for a costly taxi ride as an alternative.
The Rush Hour Ban: When Can You Not Take Your Bike on the SeaBus?
The SeaBus is an excellent component of a “Surf & Turf” exploration day, connecting downtown’s cycling paths with the North Shore’s Spirit Trail. However, bringing your bike isn’t an unrestricted privilege. To manage commuter congestion, TransLink enforces strict rules during peak rush hours. While folding bikes are always welcome, if you’re riding a standard bicycle, you need to be aware of the “rush hour ban.” During these high-traffic periods, space is at a premium, and the number of bicycles allowed is severely limited.
Specifically, the system is designed to prioritize daily commuters over recreational cyclists during the busiest times. There is a hard limit of a maximum of 6 bikes allowed per sailing during these windows, and if that capacity is reached, you will have to wait for the next sailing. This rule is most critical on weekdays, as weekends and holidays generally have a more relaxed policy, welcoming bikes at all times subject to available space. Knowing these specific time windows is not just a suggestion; it’s a hard rule that can make or break your itinerary.
The following table, based on TransLink’s official policy, breaks down exactly when you can and cannot travel with your bike. A savvy traveler will plan their cross-harbor journey outside of the yellow zones to guarantee a smooth and predictable trip.
| Time Period | Bike Status | Details |
|---|---|---|
| Weekdays 7:00 AM – 9:00 AM | Limited (Yellow) | Maximum 6 bikes allowed per sailing |
| Weekdays 4:00 PM – 6:00 PM | Limited (Yellow) | Maximum 6 bikes allowed per sailing |
| All other weekday hours | Welcome (Green) | Bikes allowed, subject to available space |
| Weekends and holidays | Welcome (Green) | Bikes allowed at all times |
| Folding bikes (any time) | Always Allowed | Permitted on all transit including SeaBus |
Understanding this policy transforms it from a barrier into a simple planning step. It allows you to build a reliable cycling itinerary that seamlessly integrates the water-based travel of the SeaBus without the risk of being turned away at the gate. It’s another example of how knowing the system’s rules unlocks its full potential.
The Market at the End of the Line: Is Lonsdale Quay Worth the Trip?
For many, the SeaBus ride is simply the means to an end: Lonsdale Quay. But is the destination worth the journey? The answer is a resounding yes, especially for a value-conscious traveler. Far from a manufactured tourist trap, Lonsdale Quay Market is a vibrant, authentic hub of local commerce. With over 80 locally owned and operated businesses, it offers a genuine taste of North Shore life, from artisanal foods to unique crafts.
This is where the SeaBus journey pays a delicious dividend. You can grab fresh produce, local cheeses, and smoked salmon to create a gourmet picnic for a fraction of a restaurant meal’s cost. The food hall provides a diverse range of affordable and tasty options with a stunning waterfront view that you’d pay a premium for elsewhere. The market’s value proposition isn’t just about price; it’s about the quality and authenticity of the experience.
As you can see, the focus is on fresh, local ingredients that define the Pacific Northwest. Unlike a generic souvenir shop, the market provides an opportunity to engage with local producers and take home something truly representative of the region. Whether you’re assembling an impromptu lunch or looking for a unique gift, the market delivers an experience that feels both high-value and deeply connected to the local culture. It’s an essential, and delicious, part of the complete SeaBus strategy.
Bus 236: Where to Catch the Connection to Grouse from the SeaBus Terminal?
The true genius of the SeaBus for a travel hacker is its role as a gateway to the North Shore’s world-class attractions. The single fare you paid for the SeaBus is not just for one ride; it’s a key that unlocks a wider network. Thanks to TransLink’s fare system that allows for 90 minutes of transfers across bus, SkyTrain, and SeaBus, your journey doesn’t have to end at the quay. The most popular connection is the #236 bus, the direct route to the base of Grouse Mountain.
The connection is brilliantly designed for seamless transit. You don’t even have to leave the terminal building. The bus loop is directly adjacent to the SeaBus exit, making the transfer weatherproof and incredibly efficient. However, knowing the exact bay is key to a stress-free connection. The #236 bus departs from a specific, clearly marked bay, and finding it quickly allows you to catch the next available bus, maximizing your 90-minute transfer window.
This seamless integration is what elevates the public transit system from mere transportation to a legitimate tool for tourism. By following a few simple steps, you can move from sea level to the mountain base using a single fare, a hack that saves both time and significant money compared to driving or taking a taxi.
Your Action Plan: The Lonsdale Quay to Grouse Mountain Connection
- Exit the SeaBus at Lonsdale Quay terminal, following the prominent ‘Bus Connections’ signs.
- Walk directly through the terminal building and SkyWalk; do not exit to the street level below.
- Locate the bus bays immediately adjacent to the SeaBus terminal. The bays are numbered.
- Find Bay 6, which is clearly marked for the #236 bus route to Grouse Mountain.
- Tap your Compass Card or contactless payment on the bus reader; it will register as a free transfer if within your 90-minute window.
Front or Back: Which End of the SeaBus Has the Best City Views?
Once you’re on board, securing the best vantage point is the final piece of the puzzle. While any window offers a pleasant view, a strategic choice will dramatically improve your sightseeing and photography experience. The SeaBus is symmetrical, with large panoramic windows at both the front and back. The “best” end depends entirely on your direction of travel and what you want to see.
For the classic, iconic postcard shot, the southbound journey from Lonsdale Quay to Waterfront is superior. By positioning yourself at the front (south-facing) windows, you get an uninterrupted, approaching view of the downtown skyline, the famous sails of Canada Place, and the bustling port. This is the money shot. Conversely, when traveling northbound to Lonsdale, the front (north-facing) windows offer a breathtaking panorama of the North Shore mountains, including Grouse Mountain and Mount Seymour, providing a sense of scale and natural grandeur.
However, the front windows are often the most crowded. The pro-tip for photographers and those seeking a clearer shot is to use the side windows. They often have fewer people blocking the view and can offer cleaner angles with fewer reflections from the interior lights. Boarding last can also be a surprisingly effective strategy; it allows you to survey the scene and grab an empty window seat while others rush to the middle.
- Best view southbound (to Waterfront): Position at the front/south windows for the iconic downtown skyline and Canada Place sails.
- Best view northbound (to Lonsdale): Position at the front/north windows for the expansive North Shore mountain panorama.
- Side Window Strategy: Use east or west side windows for clearer shots with fewer reflections and less crowding than the main front windows.
- Glare Management: Cup your hand around the lens or shoot at an angle to the glass to minimize window reflections.
- Last On, First View Trick: Board last to survey available window seats rather than rushing into crowded middle sections.
Prospect Point or Ambleside: Which Angle Shows the Bridge and Ocean Best?
Vancouver offers many famous land-based viewpoints, like Prospect Point in Stanley Park or the shores of Ambleside in West Vancouver. These spots provide fantastic, elevated views of the Lions Gate Bridge and the ocean. However, they all share one characteristic: they are static and from a high angle. This is where the SeaBus provides a truly unique and, for some shots, superior perspective. It offers a dynamic, water-level view that is impossible to replicate from land.
From the water, you capture the immense scale of the container ships passing beneath the bridge. You see the bridge not as a static object, but as a functioning artery of the city, with the dense forest of Stanley Park on one side and the industrial port on the other. This low-angle perspective emphasizes the relationship between the city and the sea, creating a more dramatic and immersive photograph. Destination Vancouver’s own guides highlight this unique quality.
As Destination Vancouver notes in its experience guides, the SeaBus offers something invaluable. As they put it:
The SeaBus provides a unique, water-level, panoramic perspective that land-based lookouts can’t provide
– Destination Vancouver, SeaBus Sprint experience guide
This isn’t about which view is “better,” but about understanding the different stories each perspective tells. For a frugal travel hacker, the SeaBus doesn’t just offer a “cheap” view; it offers a narratively different and arguably more dynamic view, adding another layer of value to the simple transit fare.
Waterfront Station: How to Connect from Canada Line to SeaBus?
For many travelers, especially those arriving from Vancouver International Airport (YVR) or the southern suburb of Richmond, the journey begins on the Canada Line SkyTrain. The final stop, Waterfront Station, is a grand, historic building that serves as a major transit hub. The connection from the Canada Line platform to the SeaBus terminal can be confusing for a first-timer, but a simple “efficiency hack” makes it incredibly smooth and seamless.
The secret lies in your positioning on the train *before* you even arrive. By choosing the right train car, you can save minutes and significant walking distance. This is the kind of micro-optimization that defines the travel hacker mindset: a small, strategic choice with a disproportionately positive outcome. The connection itself is entirely indoors and climate-controlled, a welcome feature on a rainy Vancouver day.
Follow these steps for the most efficient transfer, a trick seasoned local commuters use every day:
- When traveling from YVR or Richmond, make sure to board the LAST car of the Canada Line train.
- When the train doors open at Waterfront Station, you will be positioned directly in front of the main escalators.
- Take the escalators up and follow the overhead signs for “SeaBus.” The path will lead you through the historic station and into the SkyWalk corridor.
- This indoor SkyWalk connects directly to the SeaBus terminal, with no need to go outside.
- For those with luggage, strollers, or mobility aids, elevators providing a step-free route are located at the south end of the platform.
By using this simple trick, you transform a potentially confusing navigation puzzle into a straight, efficient line. You’ll bypass the crowds and arrive at the SeaBus fare gates feeling like a local, ready for the next leg of your journey.
Key Takeaways
- The SeaBus offers a unique and valuable water-level perspective of Vancouver that land-based lookouts cannot replicate.
- Mastering the 90-minute transfer rule allows you to connect to attractions like Grouse Mountain for the price of a single fare.
- Knowing system constraints, such as evening frequency and rush-hour bike rules, is essential for a smooth and predictable journey.
Stanley Park Seawall: How to Ride the One-Way Path Without Getting Fined?
The ultimate expression of the SeaBus’s value is not the ride itself, but how it enables the “Ultimate Surf & Turf Loop.” This itinerary combines Vancouver’s most iconic experiences—the Stanley Park Seawall and a harbor crossing—into one seamless, car-free day. The plan involves riding the world-famous Seawall and then using the SeaBus to cross the inlet and explore the North Shore’s equally scenic Spirit Trail. However, a critical piece of local knowledge is required: the Stanley Park Seawall is a strictly one-way, counter-clockwise path for cyclists. Ignoring this rule will not only earn you the ire of locals but also potentially a fine.
The strategy is to start your day with the Seawall. Rent a bike in the West End or Coal Harbour and ride the mandatory counter-clockwise loop. This 9-kilometer path offers stunning, ever-changing views of the city, mountains, and ocean. After completing the loop, you head to Waterfront Station, take your bike onto the SeaBus (avoiding the rush-hour ban, of course), and cross over to Lonsdale Quay. Once there, you can have lunch at the market and then hop on the Spirit Trail, a flat and scenic waterfront path that stretches across North Vancouver.
This “Surf & Turf” plan is the pinnacle of frugal travel hacking. For the cost of a bike rental and a one-zone or two-zone transit fare, you create a full-day, multi-faceted adventure that covers dozens of kilometers of world-class scenic pathways on both land and sea. It’s an experience that feels epic and expansive, yet is rooted in the simple, elegant efficiency of the public transit system.
By reframing the SeaBus as a strategic connector, you unlock a completely new way to experience Vancouver. To put these principles into practice, your next step is to evaluate your own itinerary and identify where this “Surf & Turf” strategy can replace a more expensive, less efficient travel plan.