The secret to a stress-free Whistler drive isn’t just leaving at 4 AM; it’s learning to sidestep the ‘tourist gravity’ that traps everyone else in traffic, unexpected costs, and crowded spots.
- A simple ferry day trip to Victoria can easily balloon with over $300 in hidden fees for fares, parking, and reservations.
- Thinking like a local means having a rainy-day backup plan and knowing which hidden waterfalls to visit while others wait in line.
Recommendation: Stop thinking about just the one highway. Start mastering the entire ecosystem of escaping Vancouver—from ferry strategies to trailhead parking tactics—to truly enjoy your time outside the city.
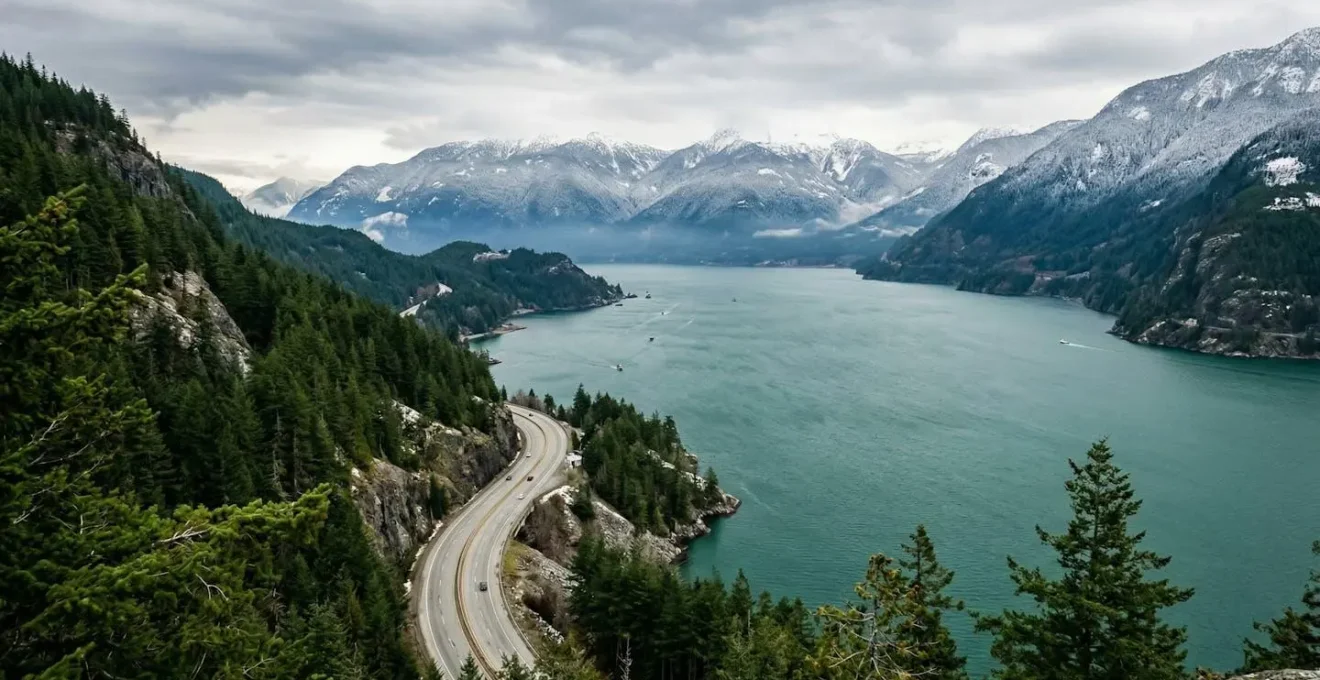
The vision is iconic: a ribbon of asphalt winding between mountains and ocean, leading you from the glass towers of Vancouver to the alpine paradise of Whistler. The Sea-to-Sky Highway is more than a road; it’s a promise of adventure. But for a first-time driver in a rental car, that promise can quickly curdle into the reality of brake lights, weekend congestion, and a creeping sense of frustration. The common advice is always the same: leave early, check DriveBC, avoid Fridays. This is tourist advice. It’s correct, but it’s not the whole story.
As someone who drives these roads daily, I can tell you the traffic on Highway 99 is just a symptom. The real challenge is mastering the entire ecosystem of escaping Vancouver. It’s a logistical puzzle involving not just highways, but ferries, weather patterns, parking strategies, and the powerful magnetic pull of tourist traps. You can have a perfect, traffic-free drive to Whistler and still have a terrible day if you fall into the other pitfalls that await the unprepared.
This guide isn’t about telling you to wake up at dawn. It’s about reprogramming your approach. We’ll dissect the unspoken rules that locals live by, from understanding the true cost of a “simple” ferry trip to knowing which day trip is best when the forecast calls for rain. It’s time to stop being a passenger in the weekend traffic jam and start driving like you own the road. This is your playbook for outsmarting the crowds and truly experiencing the best of British Columbia, beyond the city limits.
This article will break down the key strategies and hidden challenges you need to be aware of. The following summary outlines the critical choke points and opportunities that can make or break your day trip from Vancouver.
Summary: A Commuter’s Guide to Navigating Vancouver’s Day Trip Labyrinths
- Why a Day Trip to Victoria Costs $300 CAD More Than You Expected?
- How to Catch the Horseshoe Bay Ferry on a Friday Afternoon Without a Reservation?
- Squamish or Harrison Hot Springs: Which Day Trip Fits a Rainy Forecast?
- The 3 Waterfalls on the Way to Whistler That 80% of Tourists Miss
- The Parking Mistake at Provincial Parks That Attracts Thieves
- Evo vs Uber: Which Car Share Option Is More Eco-Friendly?
- The Car Trails: Where Is the Best Overpass for Traffic Light Streaks?
- The Grouse Grind: How to Survive “Mother Nature’s Stairmaster” as a Beginner?
Why a Day Trip to Victoria Costs $300 CAD More Than You Expected?
Ah, Victoria. A charming, easy day trip, right? For the unprepared, it’s the ultimate financial lesson in BC travel. The sticker shock doesn’t come from the souvenir shops; it’s baked into the journey itself. The first mistake is only looking at the passenger fare. The real cost is the vehicle. As a local, we call this the “$300 Question”: how did a simple boat ride cost so much? The answer lies in a cascade of fees that most tourists don’t see coming. It starts with the base fare for you and your car, but it doesn’t end there.
The core of the cost is the vehicle fare, which is far more than a simple passenger ticket. For a standard vehicle and driver, you are already looking at a significant outlay. A round trip with a vehicle isn’t just double the one-way price; it’s the foundation upon which other costs are built. According to current BC Ferries pricing, a one-way trip is $82.35 per person with a vehicle, making a round trip before any other factors nearly $165.
But that’s just the beginning. You have to add any additional passengers, which are charged per person, each way. Then there’s the fuel surcharge, a variable cost that BC Ferries adjusts quarterly. Want to guarantee your spot and avoid a multi-sailing wait? That’s a reservation fee, which can range from a few dollars to much more depending on demand and fare type. And what about parking at the Tsawwassen terminal if you decide to walk on? That’s another $23 per 24-hour period. When you add it all up for a family of four, the ferry journey alone can easily surpass $250-$300, turning your “affordable” day trip into a major expense before you’ve even bought your first scone.
How to Catch the Horseshoe Bay Ferry on a Friday Afternoon Without a Reservation?
It’s 3 PM on a Friday. You want to get to the Sunshine Coast or Vancouver Island from Horseshoe Bay. You don’t have a reservation. For a tourist, this is game over—a guaranteed multi-sailing wait. For a savvy local, it’s a calculated risk. The secret isn’t a magic trick; it’s understanding the ferry system’s DNA: the split between reserved and unreserved space. While it feels like every spot is booked solid, a significant portion is always held for first-come, first-served traffic.
The key is knowing the numbers. Historically, the capacity allocation on these routes has been a strategic balance. While it can change, a common model sees a split where a large percentage of the deck is saved for people who just show up. For example, some sailings operate with a model of roughly 40% reserved and 60% first-come-first-serve. This 60% is your window of opportunity. It’s a big window, but on a Friday afternoon, the lineup for it is long.
So, how do you play the odds? You arrive early. Not 30 minutes early—that’s what gets you stuck. As one TripAdvisor Community Expert advises for this exact scenario, your best bet is to commit to the wait. This means arriving well in advance of your target sailing, even if it feels excessive.
If you choose to travel standby on this route, my suggestion is to arrive 75-90 minutes prior to the scheduled sailing.
– TripAdvisor Community Expert, Vancouver Island Forum
This isn’t just about getting a spot; it’s a mental shift. You accept that an hour in the ferry lineup is the price of spontaneity. Bring a book, listen to a podcast, and relax. You’ve traded a reservation fee for a time investment, and on a busy Friday, that’s often the only currency the system accepts.
Squamish or Harrison Hot Springs: Which Day Trip Fits a Rainy Forecast?
The forecast says “liquid sunshine.” Tourists cancel their plans and mourn their lost day. Locals adapt their destination to the weather. A rainy day in the Lower Mainland isn’t a write-off; it’s a filter that helps you choose the right adventure. Two popular but very different day trips, Squamish and Harrison Hot Springs, become clear choices depending on the *type* of rain and your tolerance for it. One is an indoor-friendly hub of activity, while the other embraces the water in a more literal sense.
Your choice depends on what a “rainy day” means to you. Squamish, located along the Sea-to-Sky Highway, offers a cluster of world-class indoor and weather-resistant attractions. You can descend into the earth at the Britannia Mine Museum or ascend into the clouds in the heated cabins of the Sea-to-Sky Gondola, where the views of Howe Sound shrouded in mist can be even more dramatic than on a clear day. For Harrison, the main draw is the hot springs themselves. Soaking in a steaming mineral pool while cool rain falls around you is a classic Pacific Northwest experience. It’s a destination that fully leans into being wet.
To make an informed decision, a direct comparison is the most effective tool. The following table breaks down the key differences based on a rainy day scenario, factoring in distance, attractions, and road conditions.
| Criteria | Squamish | Harrison Hot Springs |
|---|---|---|
| Distance from Vancouver | ~65 km (1 hour) | ~130 km (1.5-2 hours) |
| Indoor Attractions | Britannia Mine Museum, Sea-to-Sky Gondola (heated cabin ride), Railway Heritage Park | Harrison Hot Springs Resort pools, Sasquatch Museum, local art galleries |
| Best for Heavy Rain | Gondola + indoor museum experiences | Natural hot springs pools (outdoor/indoor) |
| Dining/Cafes | Counterpart Coffee, Howe Sound Brewing, multiple cafes in downtown | Lake-view restaurants, resort dining |
| Hiking Options (light rain) | Alice Lake trails (forest cover), Shannon Falls viewpoint (5 min walk) | Shorter lakeside walks, limited forest trails |
| Road Conditions | Sea-to-Sky Highway: winding, potential hydroplaning risk in downpours | Highway 7: flatter, agricultural areas, flood-prone sections |
Ultimately, the choice is clear: if you want to escape the rain and be entertained indoors, Squamish offers more robust options. If you want to embrace the elements and turn the rain into part of the experience, Harrison’s hot springs are the perfect destination. A savvy driver doesn’t fight the weather; they use it to guide their journey.
The 3 Waterfalls on the Way to Whistler That 80% of Tourists Miss
The Sea-to-Sky Highway is lined with natural wonders, but most drivers are funneled by “tourist gravity” toward the two most obvious stops: Shannon Falls and Brandywine Falls. On a busy day, their parking lots are a microcosm of highway traffic—congested and competitive. But while hundreds of people are vying for the same photo, a small number of in-the-know drivers are enjoying equally spectacular waterfalls with a fraction of the crowds. The secret is knowing which turnoffs to take and which short trails lead to the biggest rewards.
The poster child for these hidden gems is Alexander Falls. Tucked away in the Callaghan Valley, this stunning 43-meter tiered cascade is arguably one of the most impressive waterfalls in the entire corridor, yet it’s the least visited. Why? Because it requires a deliberate, 9.6-kilometer detour off Highway 99. That small commitment is enough to deter the vast majority of tourists, leaving the easy-access viewing platform and its incredible perspective relatively empty. It’s the perfect example of a “local’s bypass”—a small investment of time for a massive payoff in experience.
But Alexander Falls is just one of the options. Two other waterfalls offer a superior experience to the main attractions for those willing to walk just a little bit further than the tour bus drop-off. By understanding the effort-to-reward ratio, you can plan your stops to maximize awe and minimize frustration.
Your Waterfall Bypass Plan: Effort vs. Reward
- Alexander Falls (Callaghan Valley): A 43-meter high cascade. Requires a 10-minute detour drive off the main highway, followed by a 2-minute walk from the parking lot to a year-round viewing platform. Minimal effort for a massive, crowd-free reward.
- Nairn Falls (North of Whistler): A 60-meter high powerhouse. This requires a 1.2 km hike on a moderate trail, taking about 15-20 minutes. The payoff is a close-up viewing platform positioned directly over a churning, dramatic canyon.
- Train Wreck Falls (Cheakamus River): A wide, scenic cascade. The falls themselves are often overlooked by visitors focused on the famous graffiti-covered train cars. The waterfall is a beautiful bonus, accessed via the main 1 km Train Wreck trail.
- Pro Tip for Alexander Falls: Visit in the morning (9-11 AM) for soft, beautiful light. The platform is stable, making it perfect for photographers using a tripod for long-exposure shots.
- Pro Tip for Nairn Falls: The platform’s overhead position offers a unique perspective you can’t get elsewhere. Visit in the spring when snowmelt creates the most powerful and dramatic water flow.
By swapping the crowded “must-see” spots for these incredible alternatives, you’re not just seeing a waterfall; you’re actively choosing a better travel experience, trading the stress of crowds for the tranquility of nature.
The Parking Mistake at Provincial Parks That Attracts Thieves
You’ve done it. You’ve beaten the traffic, found a stunning trail, and enjoyed a perfect day in nature. You return to your rental car, victorious, only to find the window smashed and your belongings gone. This is the final, heartbreaking tourist trap, and it’s entirely preventable. The single biggest mistake drivers make at provincial park trailheads is treating their car like a locker. Thieves know this. They patrol these lots, looking for the tell-tale signs of a tourist: a jacket slung over the back seat, a charging cable on the console, or a backpack hastily “hidden” under a seat.
The threat is real. While auto crime has been trending downwards, thousands of incidents still occur. Recent data from ICBC shows that while numbers have improved from previous years, there were still 5,355 vehicle break-ins in BC in a single year. Trailhead parking lots are prime targets because thieves know you’ll be gone for hours, far from cell service. They aren’t looking for a challenge; they are looking for an easy opportunity.
The solution is a simple but strict rule that every local lives by: the “showroom empty” principle. When you park your car, it should look like it just rolled off the dealership lot. This means:
- Absolutely nothing visible: No jackets, no bags, no loose change, no sunglasses, no GPS mounts, not even a map.
- Take it or lose it: All valuables—wallet, phone, passport, electronics—must be taken with you on your hike.
- Leave compartments open: An open glove box or center console shows a thief there’s nothing to find, and they’ll move on to an easier target.
This isn’t about being paranoid; it’s about removing all temptation. A thief who peers into your window and sees a pristine, empty interior is far more likely to simply move on. Your goal is to make your car the most boring, uninteresting target in the entire parking lot.
Evo vs Uber: Which Car Share Option Is More Eco-Friendly?
You’ve decided to explore beyond the city core but want to minimize your environmental footprint. The two most common choices for non-owners are Evo Car Share and Uber. On the surface, they seem similar—apps that get you a ride. But from an eco-friendly perspective, especially within the Vancouver context, they operate on fundamentally different principles. A savvy local knows that the greener choice isn’t just about the car itself, but the system it belongs to.
Evo is a core part of Vancouver’s transportation ecosystem. Its entire fleet consists of low-emission hybrid vehicles (Toyota Prius), meaning every single trip is guaranteed to have a smaller carbon footprint than a standard gasoline car. More importantly, it’s a “free-floating” car share service. You pick up a car, drive it to your destination, and leave it for the next person. This model is designed to supplement public transit and reduce private car ownership altogether. One Evo car can serve the needs of many people throughout the day, maximizing its usage and reducing the total number of vehicles on the road.
Uber, on the other hand, is a ride-hailing service. It doesn’t own a fleet; it connects you with a private driver in their personal vehicle. While some drivers may have hybrid or electric cars, many do not. There’s no guarantee of the vehicle type, its fuel efficiency, or its emissions. Furthermore, the ride-hailing model can contribute to congestion and emissions as drivers cruise or idle while waiting for their next fare—a phenomenon known as “deadheading.” For a specific trip, a single Uber ride in an EV might be cleaner than an Evo, but as a system, Evo’s standardized hybrid fleet and shared ownership model make it the more consistently eco-friendly choice for navigating Vancouver.
The Car Trails: Where Is the Best Overpass for Traffic Light Streaks?
Sometimes, despite your best efforts, you can’t beat the traffic. So, why not embrace it? For the creatively inclined driver, rush hour isn’t a problem; it’s a photo opportunity. The streams of red and white lights from moving cars can be transformed into stunning, abstract images through a technique called light trail photography. Instead of being frustrated by the congestion below, you can be above it all, creating art. The key is finding the right vantage point and using the right camera settings.
Vancouver is crisscrossed by bridges and overpasses that offer perfect, unobstructed views of busy arteries. One of the most iconic and accessible locations is the south end of the Cambie Bridge, looking north towards the downtown skyline. From the pedestrian walkway, you get a classic composition of light trails leading into the heart of the city, with the glittering towers of Yaletown and Downtown as a backdrop. It’s safe, legal, and delivers professional-looking results.
Of course, the location is only half the battle. Capturing those smooth, flowing lines of light requires specific camera techniques. This isn’t a point-and-shoot operation; it’s a deliberate process that involves stabilizing your camera and controlling the amount of time it sees the light. Mastering these settings is what separates a blurry snapshot from a breathtaking photograph.
Checklist for Capturing Perfect Light Trails
- Set ISO: Use a low ISO, between 100 and 400. This minimizes digital “noise” and creates a cleaner, smoother image. Only increase it if there isn’t enough ambient light from traffic.
- Set Aperture: Choose an aperture (f-stop) between f/8 and f/16. A smaller aperture (higher f-number) creates the classic “starburst” effect on streetlights and keeps more of the scene in sharp focus.
- Set Shutter Speed: This is the most crucial setting. Use a long exposure of 10 to 30 seconds. A longer shutter speed allows the camera to capture the entire path of a car’s lights as a continuous streak.
- Bring Essential Gear: A sturdy tripod is non-negotiable to keep the camera perfectly still during the long exposure. A remote shutter release or using the camera’s 2-second timer will prevent the camera shake caused by pressing the shutter button.
- Time it Right: The best time to shoot is during the “blue hour”—the 20 to 40 minutes just after sunset. This provides a deep, dramatic blue sky as a backdrop, which is more interesting than a completely black sky.
By shifting your perspective, a traffic jam ceases to be an obstacle and becomes your subject. It’s the ultimate local’s trick: turning a shared frustration into a creative outlet.
Key Takeaways
- Think Beyond the Highway: Whistler traffic is a symptom; the real challenge is mastering the entire Vancouver “escape” ecosystem, including ferries, parking, and weather.
- Calculate the True Cost: A simple day trip’s cost can balloon with hidden fees. Always factor in vehicle fares, reservations, parking, and surcharges before you go.
- Embrace the Local’s Bypass: The best experiences, like hidden waterfalls, are often just a short detour away from the main tourist flow. Avoiding crowds is a deliberate choice.
The Grouse Grind: How to Survive “Mother Nature’s Stairmaster” as a Beginner?
You’ve mastered road traffic; now it’s time for foot traffic. The Grouse Grind is a Vancouver rite of passage, a brutal but rewarding vertical climb often called “Mother Nature’s Stairmaster.” For a beginner, the challenge isn’t just physical; it’s mental. Seeing elite hikers fly past you while you’re gasping for air on the first quarter can be deeply demoralizing. The key to survival isn’t raw fitness—it’s strategy, pacing, and understanding the psychological battle of the mountain.
The trail is a relentless test. According to the official data from Grouse Mountain, you are tackling an 853-meter elevation gain over just a 2.9-kilometer distance. It’s essentially a staircase that never ends. The common mistake beginners make is starting too fast, burning all their energy on the deceptively gentler first section. A savvy hiker knows the Grind is a marathon, not a sprint, and breaks the hike down into four distinct psychological stages.
Your survival depends on winning the mental game, especially during the soul-crushing second quarter. By knowing what to expect and having a plan for each section, you can manage your energy and morale effectively, ensuring you reach the top not just in one piece, but with a sense of accomplishment.
Your Mental Game Plan for the Grind
- First Quarter (The Deception): The trail starts with a gentle incline through the forest. It feels easy. This is a trap. Pace yourself here; going fast now will cost you dearly later. Your goal is to conserve energy.
- Second Quarter (The Wall): This is the most brutal section, with the steepest, most relentless stairs. Your mental game is crucial. Focus only on the next 10 steps or the next trail marker. Do not look up. This is where most people want to quit.
- Third Quarter (The Grind): Physical and mental fatigue peaks. The worst of the steepness is behind you, but your legs are screaming. Take strategic, short rest breaks at wider sections of the trail. The knowledge that you’re past the halfway point is your biggest motivator.
- Final Quarter (The Summit Push): The end is near, and you’ll feel a renewed sense of energy. The trail becomes slightly less vertical. Though your legs are tired, seeing the light through the trees will give you the final push you need to reach the top.
- Grind Etiquette: Always stay to the right to allow faster hikers to pass on your left. If you need to stop for a break, step completely off the main path at a wide spot. Don’t block the trail.
Conquering the Grind is a powerful metaphor for any challenging journey. It’s not about being the fastest; it’s about having a plan, respecting the challenge, and putting one foot in front of the other until you reach your destination.
Now that you’re armed with the mindset of a local, you can see that a successful escape from Vancouver is about smart choices, not just speed. Plan your next adventure by applying these principles, and you’ll spend less time in a jam and more time enjoying the incredible beauty that lies just beyond the city.