In summary:
- Always choose a Compass Card with Stored Value over tapping a foreign credit card to avoid extra fees and benefit from automatic fare capping.
- The $5 YVR AddFare is only charged when leaving the airport, not when traveling to it. Your return trip is cheaper.
- On weekends and holidays, all transit trips across all zones are charged as a 1-zone fare, making Stored Value the most economical choice.
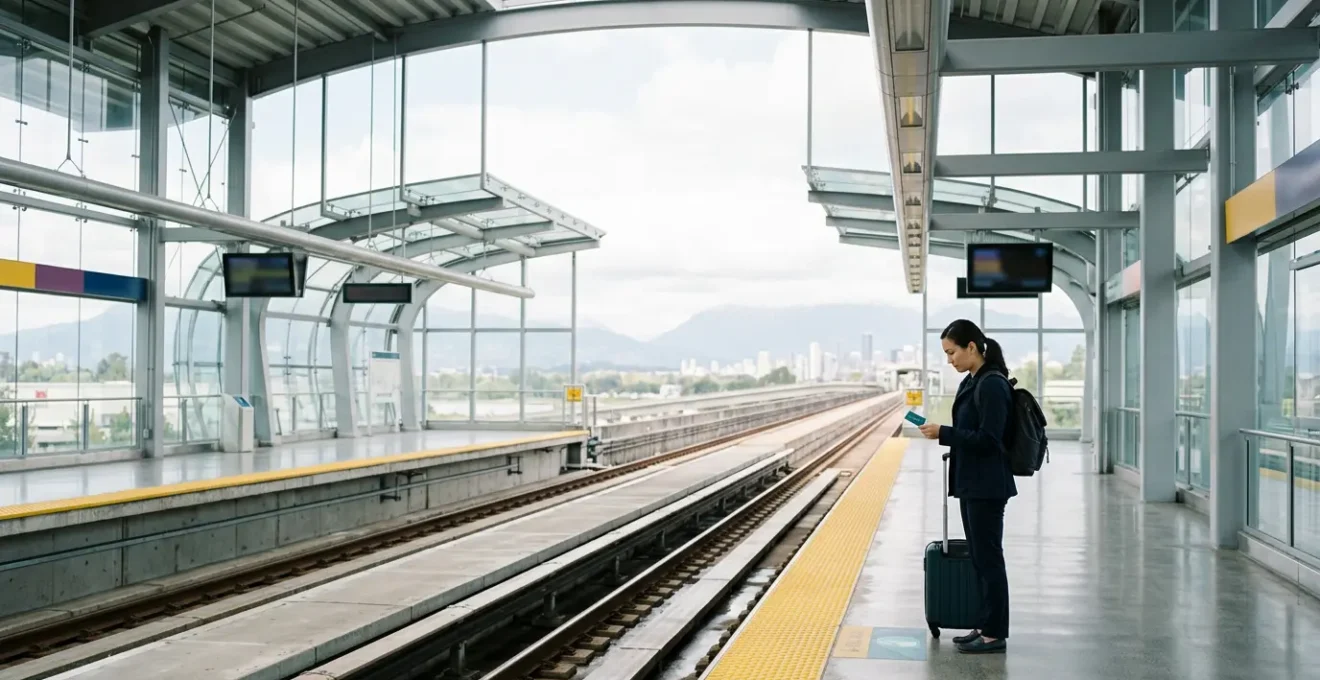
You’ve just landed at Vancouver International Airport (YVR), navigated baggage claim, and now you’re facing your first logistical challenge: the transit system. You see the signs for the SkyTrain, a clean, efficient link to the city. But then you see the fare machines, the maps showing three different zones, and hear mentions of a special airport surcharge. For any first-time visitor, it’s a moment of confusion. The default tourist move is often to just tap a credit card and hope for the best, or buy a DayPass assuming it’s the simplest option. This is where the unnecessary spending begins.
The common advice focuses on the basics: the existence of a 3-zone system and the Compass Card. But mastering Vancouver’s transit isn’t about memorizing a fare chart; it’s about understanding the system’s hidden logic, the very rules that daily commuters use to their advantage. The key to saving money isn’t just about choosing the right ticket type—it’s about leveraging features like automatic fare capping, knowing the one-way nature of the YVR AddFare, and even positioning yourself correctly on the train platform. This isn’t just a fare guide; it’s a logistical manual for reducing system friction.
This article demystifies the entire process from a commuter’s perspective. We’re going to break down the costly traps, highlight the cost-saving mechanisms built right into the Compass Card, and provide the practical, on-the-ground knowledge you need. By the end, you won’t just know how to get from the airport to your hotel; you’ll understand how to navigate the entire network with the efficiency and confidence of a local, ensuring your travel budget is spent on Vancouver’s experiences, not on avoidable transit fees.
To help you master the system, this guide breaks down every key decision and logistical challenge you’ll face. The following sections cover everything from the airport surcharge and fare options to platform navigation and luggage strategy, giving you a complete playbook for efficient travel.
Summary: Mastering Vancouver’s SkyTrain from YVR
- The $5 Surcharge: Why Is the Ticket More Expensive Leaving the Airport?
- Auto-Load or Day Pass: Which Compass Card Option Save Tourists Money?
- Refundable $6 Fee: How to Get Your Compass Card Deposit Back Before Flying Out?
- Waterfront Station Confusion: Which Platform Leads to the Airport?
- The “End of the Car” Trick: Where to Put Suitcases on a Crowded Train?
- Bus 620 Connection: How Much Time to Allow Between Bridgeport Station and the Ferry?
- The “Richmond Driver” Stereotype: Is It Dangerous to Drive in the Golden Village?
- Is the SkyTrain Safe to Ride Alone After Midnight?
The $5 Surcharge: Why Is the Ticket More Expensive Leaving the Airport?
The first financial surprise for many travelers is the YVR AddFare, a $5 surcharge applied to most journeys starting from the airport. This isn’t a tourist tax, but a specific fee designed to help pay off the construction debt from the Public-Private Partnership (P3) that funded the Canada Line’s airport extension. Understanding its rules is the first step in managing your transit costs effectively.
The AddFare is only triggered when you begin a journey at one of the three Sea Island stations (YVR-Airport, Sea Island Centre, or Templeton) and travel eastbound past Sea Island to the rest of the network. It applies whether you use a Compass Card, contactless payment, or a cash ticket. Crucially, it does not apply when traveling TO the airport, so your return trip will be significantly cheaper. Furthermore, travel between the three stations on Sea Island itself is entirely free, a useful perk if you’re visiting the nearby outlet mall at Templeton Station.
While the AddFare feels unavoidable for most, knowing its mechanics reveals its limits. It’s a one-time exit fee, not a general airport tax. This distinction is key to understanding your total round-trip cost and making an informed decision about your fare product, which we’ll explore next. For the truly budget-conscious, there’s even a little-known loophole involving a short walk or shuttle ride, though for most, the time cost outweighs the saving. Here’s how it works:
- What Gets Charged: The AddFare applies to all journeys originating from YVR-Airport, Sea Island Centre, or Templeton stations when traveling beyond Sea Island.
- Free Travel on Sea Island: Trips between the three Sea Island stations are completely free; you can tap in and out without any charge.
- The Sea Island Centre Loophole: Technically, you can take a free airport shuttle or walk to Sea Island Centre station and begin your paid journey there to avoid the AddFare, though this adds 10-15 minutes.
- Why It Exists: The AddFare revenue is directed to TransLink to help repay the debt that funded the Canada Line’s airport section construction.
- Exemptions: Monthly pass holders and those using a DayPass purchased *before* arriving on Sea Island are exempt from the AddFare when leaving the airport.
Auto-Load or Day Pass: Which Compass Card Option Save Tourists Money?
At the YVR fare machine, you’re faced with a critical choice: load your Compass Card with Stored Value (pay-per-trip) or buy a DayPass? For most tourists, the answer is surprisingly simple: choose Stored Value. The reason lies in two powerful, often misunderstood features: automatic fare capping and the weekend discount.
The single most important feature for any visitor is fare capping. When you use Stored Value on your Compass Card, the system automatically stops charging you once your total fares for the day reach the cost of a DayPass. This means you get the benefit of a DayPass without having to pre-purchase it. If you only take two trips, you only pay for two trips. If you take five or six, you’re automatically capped and pay no more. This completely removes the risk of overpaying. Conversely, a major pitfall is the “contactless trap.” Tapping a foreign credit or debit card at the fare gate seems convenient, but it’s a costly mistake. These payments are not subject to fare capping and often incur a foreign transaction fee on every single tap, quickly inflating your costs.
The table below breaks down the cost-effectiveness based on typical tourist itineraries, showing why Stored Value is almost always the superior financial choice, especially when considering that as of July 2026, an adult DayPass costs $12.55.
| Scenario | Trips in One Day | Stored Value Cost | DayPass Cost | Recommended Option |
|---|---|---|---|---|
| Light Sightseeing | 2 trips (YVR to hotel, hotel to downtown) | $5.70 – $9.80 | $12.55 | Stored Value |
| Active Exploration | 4+ trips (YVR to hotel, Granville Island, Stanley Park, Gastown) | $11.40+ (capped at DayPass) | $12.55 | DayPass or rely on fare capping |
| Multi-Zone Commuting | 3+ trips crossing 2-3 zones | $11.55+ | $12.55 | DayPass |
| Weekend Travel | Any trips (all zones = 1-zone fare) | $2.85 per trip | $12.55 | Stored Value unless 5+ trips |
The final nail in the coffin for pre-purchasing a DayPass is the weekend rule. On Saturdays, Sundays, and statutory holidays, the entire TransLink network becomes a single zone. Every trip, no matter how far, costs a 1-zone fare. On these days, you’d need to take five separate trips to make a DayPass worthwhile. For a tourist, starting with a modest amount of Stored Value is the most flexible and economically sound strategy.
- Fare Capping Protection: If you use Stored Value, the system automatically stops charging once you hit the DayPass equivalent in a single day, so you never overpay.
- Contactless Credit Card Trap: Tapping a foreign credit card directly at fare gates incurs foreign transaction fees on each tap AND does not benefit from daily fare capping like a Compass Card does.
- Purchase Strategy: Buy a Compass Card and load $20-30 Stored Value for flexibility; fare capping means you get DayPass benefits automatically when needed.
- Transfer Window: All trips are free within a 90-minute window from your first tap, maximizing value.
- Weekend Advantage: On Saturdays, Sundays, and holidays, all trips are charged at the 1-zone rate, making Stored Value far more economical than a DayPass.
Refundable $6 Fee: How to Get Your Compass Card Deposit Back Before Flying Out?
Every new adult Compass Card comes with a refundable deposit for a Compass Card is $6. While it’s a small amount, for the efficient traveler, recovering this deposit along with any leftover balance is the final step in a perfectly executed transit plan. Unlike some cities where transit cards become souvenirs, TransLink makes it possible to get your money back, but it requires a specific action before you head to the airport for your flight home.
The most direct way to get an immediate refund is in person. You cannot get a refund at a regular SkyTrain station vending machine or at the airport. You must go to the TransLink Customer Service Centre located at Waterfront Station in downtown Vancouver. It’s on the second floor of the historic main station building. Simply bring your physical card to the counter, and they can process the refund for both the deposit and any remaining Stored Value on the spot. For larger balances, they may issue a cheque, but smaller amounts are often returned in cash.
If a trip to Waterfront Station doesn’t fit into your departure day schedule, a mail-in option is available, but it’s much slower. This requires filling out a form and sending your card to the Compass Customer Service office, with processing taking over 10 business days. For most tourists, the in-person visit is the only practical method. Planning a quick stop at Waterfront before your final journey to YVR is the most efficient way to close the loop on your transit spending.
Your Action Plan: Compass Card Refund at Waterfront Station
- Locate the Service Centre: Go to the TransLink Customer Service Centre on the 2nd floor of Waterfront Station (via the West Cordova Street entrance).
- Bring Your Card: You must surrender the physical Compass Card to process the refund.
- Request Full Refund: Ask for both your $6 deposit and any remaining Stored Value balance.
- Receive Reimbursement: Get an immediate cash refund for small amounts or a cheque for balances over a certain threshold.
- Plan B (Mail-in): Alternatively, mail your card with a completed refund form to Compass Customer Service, but allow 10+ days for processing.
Waterfront Station Confusion: Which Platform Leads to the Airport?
Waterfront Station is Vancouver’s grand central transit hub, a beautiful and historic building where the Canada Line, Expo Line, SeaBus, and West Coast Express converge. For a visitor, its scale can be disorienting, especially when trying to find the correct platform for the airport-bound Canada Line train. A wrong turn here can easily put you on an Expo Line train headed east to Surrey instead of south to Richmond and YVR.
The key to navigating Waterfront is understanding that the Canada Line has its own separate, dedicated platforms, distinct from the Expo Line. When you enter the main concourse from the historic Cordova Street entrance, you will need to follow signage that specifically directs you down to the Canada Line. This often involves a different set of escalators or elevators than those for the other services. The most direct route for an airport-bound traveler is often to use the dedicated Canada Line entrance on Granville Street, just south of Hastings.
Look for the distinctive teal color-coding and clear overhead signs that say “Canada Line to YVR-Airport / Richmond-Brighouse.” The trains on this platform will alternate destinations, so always check the electronic sign on the front of the train to ensure it says “YVR-Airport” before boarding. If you do make a mistake and board an Expo Line train, don’t panic. Simply get off at the next station (Burrard or Granville), tap out, and walk or backtrack to Waterfront to find the correct platform. As long as you’re within your 90-minute transfer window, you won’t be charged a new fare.
- Entry Option 1: Enter from West Cordova Street through the historic railway station building and follow signs down to the separate Canada Line platforms.
- Entry Option 2: Use the dedicated Canada Line entrance on Granville Street just south of Hastings for the most direct access.
- Key Navigation Tip: Look for wayfinding specifically indicating “Canada Line to YVR-Airport/Richmond.” Do not follow general “SkyTrain” signs which may lead to the Expo Line.
- Recovery Strategy: If you accidentally board the wrong line, exit at the next stop and backtrack to Waterfront. Your 90-minute transfer will prevent a new fare.
The “End of the Car” Trick: Where to Put Suitcases on a Crowded Train?
One of the most common points of friction for travelers is managing luggage on a busy train. The Canada Line trains, while efficient, are not designed like dedicated airport express trains with ample luggage racks. During peak hours, finding a spot for your suitcase without blocking aisles or doors can be a stressful puzzle. However, commuters know a simple trick: aim for the middle car of the train.
Canada Line trains are typically composed of two-car sets. The area where the two cars join, known as the articulation, as well as the middle of the train, often has more open floor space than the ends of the cars, which are filled with seating. This area is also where the designated wheelchair and stroller spaces are located, making it the most logical place for bulky items. To execute this strategy effectively, you need to position yourself correctly on the platform at YVR-Airport Station. Stand roughly in the middle of the platform to align with the middle doors when the train arrives.
Another key piece of logistical knowledge is the concept of the reverse commute. If you are traveling from YVR towards downtown between 4 PM and 6 PM on a weekday, you are moving against the main flow of rush hour traffic. While trains heading *to* Richmond and YVR will be packed with commuters leaving the city, your train heading *into* the city will be comparatively empty, making the luggage issue almost non-existent. If a train does arrive crowded, remember that Canada Line trains run frequently—every 6-7 minutes during most of the day—so simply letting one train go and waiting for the next, less-crowded one is a viable, low-stress option.
- Target the Middle Car: The central articulated section of Canada Line trains has the most open floor space, ideal for suitcases.
- Reverse Commute Advantage: Traveling from YVR to downtown during evening rush hour (4-6 PM) means you’re going against traffic, resulting in emptier trains.
- Platform Positioning: At YVR-Airport Station, wait in the middle of the platform to board the center of the train.
- Accessibility Alignment: The middle car entrances often align with platform elevators, providing more floor space for luggage and mobility devices.
- Off-Peak Travel: With high frequency, you can afford to wait for the next, less-crowded train if the first one is full.
Bus 620 Connection: How Much Time to Allow Between Bridgeport Station and the Ferry?
For travelers heading to Vancouver Island or the Gulf Islands, the journey often involves a transfer from the Canada Line to the #620 bus at Bridgeport Station, which provides the connection to the Tsawwassen Ferry Terminal. This is a critical logistical link, and miscalculating the time required can mean missing a ferry. While the bus is timed to meet sailings, traffic conditions, particularly near the Massey Tunnel, can be highly variable.
As a rule of thumb for efficient planning, you should allow different buffer times based on your travel schedule. During off-peak hours (such as mid-morning or early afternoon on a weekday), a total travel time of 45-50 minutes from arriving at Bridgeport Station to arriving at the ferry terminal is a safe bet. This includes wait time for the bus and the bus journey itself.
However, this changes dramatically during peak traffic periods. If you are traveling on a Friday afternoon, especially before a long weekend, traffic on Highway 99 can be extremely heavy. In this scenario, you must extend your time allowance significantly, to at least 75-90 minutes. The #620 bus route operates hourly to meet BC Ferries sailings, often with several buses running in a convoy to handle the passenger load. If you miss your intended bus, the next one is typically an hour away, which could jeopardize your sailing reservation. As a backup, a taxi or rideshare from Bridgeport to Tsawwassen is an option, costing around $35-50 and taking 25-30 minutes in clear traffic.
- Off-Peak Timing (Recommended): Allow 45-50 minutes total from Bridgeport Station to Tsawwassen Ferry Terminal.
- Peak Hours (Friday PM): Allow 75-90 minutes due to heavy pre-weekend traffic approaching the Massey Tunnel.
- Route Details: Bus 620 operates hourly, timed to meet ferry sailings, often running in groups of 2-3 buses.
- Plan B – Miss the Bus: If you miss your connection, the next Bus 620 is about 60 minutes later. A taxi/Uber is a faster but more expensive alternative.
- Seasonal Service: More frequent trips run during the summer season (late April to early September) to meet higher ferry demand.
The “Richmond Driver” Stereotype: Is It Dangerous to Drive in the Golden Village?
Visitors exploring Richmond’s vibrant Asian dining and shopping scene, particularly in the area known as the “Golden Village” along No. 3 Road, might hear locals talk about the “Richmond driver” stereotype. This usually refers to perceptions of unpredictable driving habits and notoriously congested parking lots. While the driving danger is often exaggerated for comedic effect, the stress of navigating the parking structures at major hubs like Aberdeen Centre or Parker Place is very real, especially on weekends.
For a tourist, the most efficient and stress-free solution is to bypass this entire issue by using the Canada Line. The SkyTrain was designed to serve these commercial cores directly, making it a far superior alternative to driving and parking. This is a prime example of leveraging the transit system for logistical efficiency, turning a potential point of stress into a simple, predictable journey. The system provides direct access to the heart of Richmond’s shopping districts.
The Canada Line essentially acts as a land-based cruise ship, dropping you off directly at the doorstep of your destination. This approach not only saves you the headache of navigating confusing multi-level parkades but also time and money on gas and parking. With trains running every 6-7 minutes throughout the day, the system offers the flexibility for spontaneous trips without being tethered to a vehicle.
- Aberdeen Station: Exits directly into Aberdeen Centre, providing immediate access to Richmond’s largest Asian shopping complex without any parking hassle.
- Lansdowne Station: Serves Lansdowne Centre and is a short 5-minute walk to the dense commercial and dining strip along No. 3 Road.
- Richmond-Brighouse Station: The terminus station is the gateway to Richmond Centre mall and the city’s downtown core, with frequent bus connections to all other areas.
- Parking Reality: Parking lots at major Richmond malls are famously congested, particularly on weekends, making the SkyTrain a reliable and stress-free alternative.
- Service Frequency: High-frequency service makes it easy to plan shopping and dining trips without worrying about vehicle dependency.
Key takeaways
- Fare Capping is Your Best Friend: Using Stored Value on a Compass Card automatically protects you from overpaying, converting to a DayPass once you hit the daily limit.
- Avoid the Contactless Trap: Tapping a foreign credit card at fare gates will cost you more due to transaction fees and a lack of fare capping.
- The YVR AddFare is One-Way: The $5 surcharge only applies when leaving the airport area, making your return trip to YVR cheaper.
Is the SkyTrain Safe to Ride Alone After Midnight?
For a solo traveler, especially one arriving on a late flight, safety is a primary concern. The question of whether it’s safe to ride the SkyTrain alone after midnight is a valid one. The answer, based on the system’s design and dedicated security presence, is overwhelmingly yes. The SkyTrain system is monitored and patrolled, with several built-in features designed to enhance passenger safety at all hours.
The system is actively patrolled by the Metro Vancouver Transit Police, a dedicated police force with jurisdiction over the entire transit network. With a significant number of officers covering the stations and rail lines, their presence is a visible deterrent. According to Metro Vancouver Transit Police, 204 police officers and 24 Community Safety Officers patrol the system’s 148 km of rail and 63 stations, providing a constant security overlay. This is far more robust than the security on a typical city bus system.
Beyond human patrols, the trains and stations are equipped with numerous safety features. Every train car has a silent alarm—a yellow strip above the windows—that can be pressed to discreetly alert the SkyTrain attendant of a concern. Platforms have Designated Waiting Areas that are well-lit and equipped with emergency phones. For non-urgent concerns, you can even text Transit Police directly at 87.77.77 to report an issue without drawing attention to yourself. By using these tools and maintaining situational awareness, riding the SkyTrain late at night can be a secure and worry-free experience.
- Use Designated Waiting Areas: On platforms, position yourself in the well-lit areas marked with blue emergency phone locations.
- Silent Alert System: Press the yellow emergency strip inside train cars to discreetly alert the SkyTrain attendant.
- Strategic Seating: Sit in the first car of the train, which is often visible to the operator via internal cameras.
- Text for Help: Use the Transit Police text line 87.77.77 to report concerns discreetly without needing to make a phone call.
- Emergency Contact: For immediate emergencies, call Transit Police directly at 604.515.8300 or dial 911.
Now that you’re armed with this insider knowledge, you’re ready to navigate Vancouver’s transit system not as a confused tourist, but with the confidence and efficiency of a seasoned commuter. Enjoy the ride, and enjoy the savings.