For a 5-day tourist trip in Vancouver, a pre-loaded Compass Card is almost always more cost-effective than using Day Passes or tap-to-pay, provided you make more than 10 individual trips and strategically reclaim the card’s deposit.
- Tap-to-pay (credit/debit card) adds a significant premium to every single trip and may incur foreign transaction fees.
- Day Passes are only economical on days with four or more separate journeys, a rare scenario for most tourist itineraries.
Recommendation: Load your Compass Card with an initial $30-$40. On your last day, use the ‘negative balance’ feature for your final airport trip to maximize the value you extract from the $6 deposit.
You are standing in front of a Compass Vending Machine at Vancouver International Airport (YVR), faced with a choice that feels more complex than it should be. The screen presents a menu of options: a Day Pass, a new Compass Card with a Stored Value option, or the promise of simply tapping your credit card at the gate. For a tourist on a 5-day visit, this isn’t just a question of convenience; it’s a math problem. Making the wrong choice can lead to overpaying by a significant margin.
Many visitors default to the perceived simplicity of tapping their contactless credit card or buying a Day Pass for each day of their stay. These are straightforward solutions, but they are rarely the most frugal. The convenience of tapping your Visa comes at a premium on every single ride, and a Day Pass often represents an over-purchase for a typical tourist itinerary that combines walking with a few key transit trips. The key to mastering Vancouver’s transit system isn’t about finding the easiest option, but the one with the optimal cost-benefit calculation.
This guide abandons generic advice and instead provides a clear, calculation-focused breakdown. We will treat your 5-day trip as a financial equation. By understanding the break-even points, hidden costs, and strategic value of each fare option, you can make a data-driven decision. We will analyze the per-trip cost, the real value of the $6 card deposit, and even how to optimize travel for specific scenarios like bike sharing or short airport layovers. The goal is simple: to ensure you never pay a cent more than necessary for your Vancouver transit.
To help you navigate these financial decisions, this article breaks down every critical calculation you’ll need to make. From the fundamental cost difference between payment types to advanced strategies for layovers and refunds, each section is designed to equip you with the numbers to travel smart.
Summary: A Tourist’s Financial Guide to Vancouver Transit
- Tap to Pay: Why Does Tapping Your Visa Cost More Than a Compass Card?
- The Stadium-Chinatown Office: Where to Return Your Card for a Refund?
- The “Pass Back” Error: Why Can’t Two People Use One Compass Card?
- Balance Protection: Why Should You Register Your Compass Card Online?
- Refundable $6 Fee: How to Get Your Compass Card Deposit Back Before Flying Out?
- The Vending Machine Queue: How to Check Your Balance on Your Phone?
- Mobi Bike Share: Why the 30-Minute Limit Confuses Most Tourists?
- YVR Layover: How to Visit the Designer Outlet During a 4-Hour Wait?
Tap to Pay: Why Does Tapping Your Visa Cost More Than a Compass Card?
The primary reason tapping your credit or debit card costs more is that TransLink incentivizes the use of its own closed-loop system, the Compass Card. By using a Compass Card with stored value, you receive a discounted fare on every trip. The difference is not trivial and accumulates quickly over a multi-day visit. For a standard 1-zone trip, the savings are significant; according to TransLink’s official pricing, using a Compass Card saves you $0.60 per journey compared to a tap-to-pay fare.
Let’s perform the calculation for a hypothetical 3-day, 5-trip itinerary typical for a tourist. This demonstrates how the small per-trip savings add up, but also reveals how the initial $6 card deposit impacts the short-term calculation. For international visitors, the cost of tap-to-pay is even higher, as most banks charge a 2-5% foreign transaction fee on every single tap, a cost not incurred when loading a Compass Card once.
This table provides a clear cost comparison, showing the raw travel fares. While tap-to-pay appears cheaper for a very short trip due to the card deposit, the break-even point is quickly reached. A detailed analysis from Business in Vancouver on fare structures confirms that for any stay involving more than a handful of trips, the Compass Card discount outweighs its initial deposit cost.
| Trip Type | Zones | Tap-to-Pay (Contactless) | Compass Card (Stored Value) | Savings with Compass |
|---|---|---|---|---|
| Airport to Downtown (Day 1) | 2 zones + $5 AddFare | $9.65 | $8.85 | $0.80 |
| Downtown to Kitsilano (Day 2) | 1 zone (bus) | $3.20 | $2.60 | $0.60 |
| Kitsilano to North Van/Capilano (Day 2) | 2 zones | $4.65 | $3.85 | $0.80 |
| North Van to Downtown (Day 3) | 2 zones | $4.65 | $3.85 | $0.80 |
| Downtown to Airport (Day 3) | 2 zones + $5 AddFare | $9.65 | $8.85 | $0.80 |
| Total for 5 trips | – | $31.80 | $28.00 | $3.80 |
| After $6 card deposit | – | $31.80 | $34.00 | -$2.20 |
| Note: Savings become positive after 10+ trips. International tourists must also factor in 2-5% foreign transaction fees on tap-to-pay. | ||||
The Stadium-Chinatown Office: Where to Return Your Card for a Refund?
For the frugal traveler, the $6 Compass Card deposit is not a sunk cost but a recoverable asset. Officially, TransLink provides two primary in-person locations for obtaining a full refund of both your deposit and any remaining balance: the TransLink Customer Service Centre at Waterfront Station (on the second floor) and the Compass Customer Service Centre at Stadium-Chinatown Station. You can also request a refund by mailing the card, but this involves a 4-week processing time and a cheque issued only in Canadian dollars, making it impractical for most tourists.
However, a purely mechanical approach to refunds ignores the strategic reality faced by many visitors. As highlighted in a practical discussion among tourists, the service offices have limited hours and are notably closed on Sundays. This forces many weekend visitors departing on a Sunday to either forfeit their deposit or deal with the mail-in process. The most cost-effective solution is often a calculated workaround: the ‘negative balance’ feature.
This fare optimization strategy allows you to use your $6 deposit to cover your final fare. Even if your card has a minimal balance (e.g., $0.05), you can tap in for your last journey to the airport. The system will allow the fare to be deducted, drawing from your deposit. For a 2-zone trip from downtown to YVR, the Compass fare is $3.85 (plus the $5 AddFare, which is waived when travelling *to* the airport). By using this method, you effectively ‘reclaim’ $3.85 of your deposit as a paid fare, a much better outcome than forfeiting the entire $6. This is the financially optimal strategy for any tourist who cannot easily visit a refund office during operating hours.
The “Pass Back” Error: Why Can’t Two People Use One Compass Card?
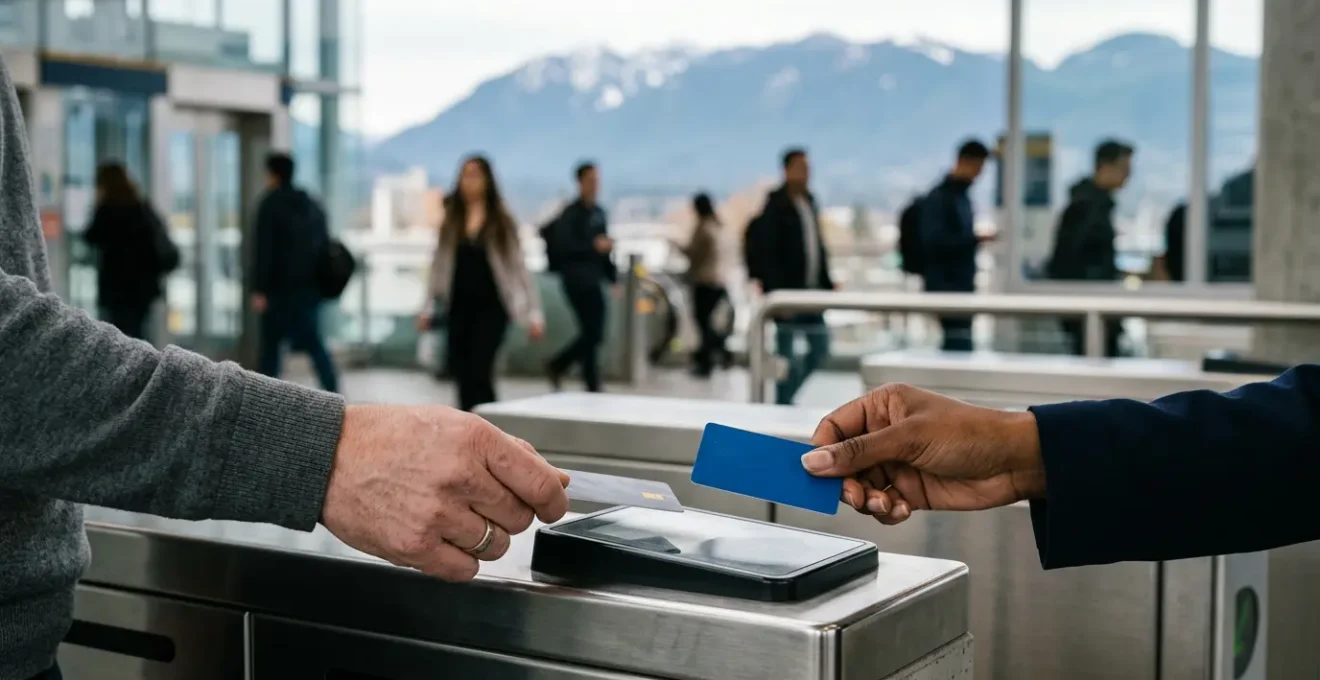
A common question from families or groups is whether one person can tap in and then hand the card back to the next person. The system’s logic is designed to prevent this, enforcing a strict one-person-per-card rule. The fare gates and bus readers have a “pass-back” prevention feature. Once a card is tapped in, it cannot be used to tap in again at the same station or on the same bus for a set period. This ensures that each traveler has their own valid proof of payment.
This policy is a fundamental component of the fare calculation system, which needs to know the entry and exit points for each individual to charge the correct zone-based fare. Sharing a card would make this impossible. TransLink’s official policy is unequivocal on this matter. As stated in their terms of use, sharing a card for simultaneous travel is not permitted.
You can’t use your Compass Card to pay for more than one person’s travel at the same time. (That means you can’t tap in and then pass your card to the person behind you.)
– TransLink Official Policy, Compass Card Terms and Conditions
Therefore, for a group of travelers, the calculation is simple: each person requires their own payment method. This could be a unique Compass Card for each person, or each individual can use their own contactless credit or debit card. For families with children, concession-fare Compass Cards are available, offering reduced rates for eligible youth and seniors.
As the image illustrates, the system is built around individual journeys. Planning for a group trip means factoring in the cost and logistics of a separate fare medium for every member of your party. There is no ‘family pass’ or group discount built into a single card.
Balance Protection: Why Should You Register Your Compass Card Online?
For a tourist on a 5-day trip, loading a Compass Card with $30 or $40 represents a small but tangible asset. Losing an unregistered card means that balance, along with the $6 deposit, is gone forever. Registering your card online at compasscard.ca is the financial equivalent of purchasing insurance for that balance—it’s a free, simple step that protects your money.
The primary benefit of registration is Balance Protection. If a registered card is lost or stolen, you can report it to Compass Customer Service. They will freeze the card to prevent fraudulent use and transfer your remaining stored value to a new card. This process is straightforward and provides complete peace of mind, especially when navigating an unfamiliar city. For a frugal traveler, protecting your pre-paid funds is a non-negotiable step in fare optimization.
The process to recover a lost, registered balance involves a few key steps:
- Immediate Registration: As soon as you purchase your card, go to the Compass Card website or call customer service to register it. This links the card’s serial number to your identity.
- Report the Loss: If your card is lost, call Compass Customer Service at 604-398-2042 immediately.
- Verify and Freeze: You’ll answer your security questions to verify your identity. The agent will then freeze the lost card.
- Get a New Card: You must purchase a new Compass Card from a vending machine or retailer, which includes paying another $6 deposit.
- Transfer the Balance: Contact customer service again with your new card’s number. They will execute the transfer of your protected balance from the old card to the new one.
It is critical to note that only the Stored Value (the money you loaded) is transferable. The $6 deposit from the lost card is forfeited. Nonetheless, protecting a $30 balance for the cost of a few minutes of online registration is a simple calculation with a clear, positive outcome.
Refundable $6 Fee: How to Get Your Compass Card Deposit Back Before Flying Out?
The final calculation of your trip involves recovering the $6 deposit from your Compass Card before you depart from YVR. Forgetting or failing to do this effectively adds $6 to your total transit cost. A strategic approach is required, especially if you are short on time. There are several methods, each with its own cost-benefit profile. The most efficient choice depends on your remaining balance and how much time you have before your flight.
The most direct methods involve interacting with a machine or person at the airport, but these can have limitations. For instance, vending machines may have limits on the refund amount they can dispense. The customer service office is the most reliable option for a cash refund, but you must account for its operating hours and potential queues. The “use it all” strategy, leveraging the negative balance feature, remains a powerful tool for time-pressed travelers.
To make the optimal decision, you need a clear, step-by-step plan. This checklist outlines the process for reclaiming your deposit at YVR, allowing you to choose the best option based on your specific circumstances.
Your Action Plan: YVR Airport Compass Card Refund Strategy
- Assess Your Card’s Value: Check your total remaining balance (stored value + $6 deposit). If it’s less than ~$8 and your flight is soon, consider the card a souvenir and prioritize security.
- Choose Your Refund Method: Based on time and balance, select one: use a vending machine for small balances, visit the customer service office for a full cash refund, or use the negative balance for your final trip.
- Execute the Vending Machine Option: Locate the Compass Vending Machine (near the 7-Eleven in the domestic terminal). Follow the on-screen instructions. Be aware it might issue a non-refundable paper ticket for your final Canada Line trip instead of cash.
- Execute the Customer Service Option: Go to the TransLink desk at YVR (check hours online beforehand). This is the best way to get a full cash refund of your deposit and any balance, but requires the most time.
- Execute the Negative Balance Trick: If your balance is low, simply tap in for your Canada Line journey to the airport. The fare will be deducted from your $6 deposit, effectively letting you “spend” part of it on your last ride.
The Vending Machine Queue: How to Check Your Balance on Your Phone?
Time is a valuable commodity for a tourist, and waiting in a long queue at a Compass Vending Machine just to check your balance is an inefficient use of it. Fortunately, there are several ways to perform this simple calculation instantly, without waiting. The most accessible method for a registered card user is through the official Compass Card website.
By logging into your account on your phone’s browser at compasscard.ca, your current balance is displayed on your account dashboard. This is the most reliable remote method, though it’s important to know there can be a delay of up to two hours for the system to reflect your most recent trip. For a quick, real-time check, there is a clever trick you can use at any SkyTrain station.
This method, which we can call the “Balance Check Tap,” provides an instant, up-to-the-second balance reading. Simply tap your Compass Card on any fare gate reader as if you were entering the system. The screen will immediately display your remaining balance. The crucial second step is to tap the card again on the same reader right away. This “taps you out” before the system registers a trip, cancelling the transaction and ensuring you are not charged a fare. This two-tap maneuver takes less than five seconds and is the fastest way to get a real-time balance check.
For Android users with NFC-enabled phones, a third option exists. Some third-party NFC reader applications available on the Google Play Store can read the balance directly from the card’s chip. This provides an instant, offline balance check. However, it’s important to note these are not official TransLink apps and their reliability can vary. This functionality is not available on iOS devices due to platform restrictions.
Mobi Bike Share: Why the 30-Minute Limit Confuses Most Tourists?
Vancouver’s public bike share system, Mobi by Shaw Go, is integrated into the urban transit landscape and can be a cost-effective way to explore areas like Stanley Park or Granville Island. However, its pricing structure, particularly the 30-minute ride limit, is a common point of confusion and a source of unexpected costs for tourists. The most popular option for visitors is the 24-Hour Pass, which offers $12 for unlimited 30-minute rides in 24 hours. The critical term here is “30-minute rides.”
This does not mean you can keep a bike for 24 hours. It means you can take as many individual trips as you want, as long as each trip—from undocking to redocking at any station—is under 30 minutes. If you exceed 30 minutes on a single continuous ride, overage fees begin to apply, and they add up quickly. This is where the calculation becomes crucial. A leisurely 90-minute ride around the Stanley Park Seawall without redocking can turn an affordable $12 pass into a costly $27 expense.
The financially optimal way to use Mobi for longer explorations is to adopt a “docking strategy.” This involves planning your route to pass by a Mobi station every 25-30 minutes to dock your bike, wait a minute, and then undock it (or a new one) to reset the timer. This requires discipline but keeps the cost fixed at the pass price. The alternative is a traditional bike rental shop, which offers simpler hourly or daily rates better suited for continuous, scenic rides. The following table, based on data from an analysis of Vancouver’s bike share options, breaks down the cost calculation.
| Scenario | Duration | Mobi Bike Share | Traditional Rental Shop | Winner |
|---|---|---|---|---|
| Quick commute | 30 minutes | $12 day pass (unlimited 30-min rides) | $8.57/hour (Spokes Rentals) | Mobi (if making multiple trips) |
| Stanley Park leisurely ride | 90 minutes (continuous) | $27 with overage fees ($12 + $15 in fees at $0.29/min) | $8.57-$11/hour | Traditional rental |
| Stanley Park with docking strategy | 90 minutes (3×30-min segments) | $12 day pass (dock at Second Beach, Third Beach, Totem Poles) | $11-$17 | Mobi (requires planning) |
| Full day exploring | 4+ hours | $12 day pass + careful 30-min segment planning | $20-$35 for full-day rental | Mobi (if disciplined with docking) |
| Conclusion: Mobi is cheapest for short point-to-point trips or full-day use with disciplined docking every 30 min. Traditional rentals win for continuous 60-90 minute scenic rides. | ||||
Key Takeaways
- A Compass Card becomes more economical than tap-to-pay after approximately 10 single-zone trips, factoring in the $6 deposit.
- Use the “negative balance” feature for your final airport trip to efficiently spend down your $6 deposit without needing an office refund.
- For Mobi bike share, plan your route to include docking stops every 25-30 minutes to avoid expensive overage fees on longer rides.
YVR Layover: How to Visit the Designer Outlet During a 4-Hour Wait?
A 4-hour layover at YVR presents a unique optimization problem: is it possible to leave the airport for a quick shopping trip to the McArthurGlen Designer Outlet and return in time for your flight? With precise calculation and timing, the answer is yes. This scenario requires a perfect execution of time management and an understanding of a specific transit rule: the Sea Island zone fare structure.
Trips on the Canada Line are subject to a special $5 AddFare that applies to trips leaving YVR Airport, Sea Island Centre, or Templeton Station and heading into Richmond or Vancouver. However, travel *between* these three stations on Sea Island is exempt from this fee. The designer outlet is a short walk from Templeton Station, just one stop from YVR. This makes a quick trip feasible and affordable, provided you buy the right fare product and stick to a strict timeline.
For this specific mission, a Compass Day Pass ($11.95) is the most logical purchase. It covers your round trip without worrying about calculating exact fares or AddFares, and provides maximum flexibility in case of unexpected delays. The following timeline, inspired by local transit guides, provides the critical path for a successful 4-hour (240-minute) layover excursion.
Your Action Plan: 4-Hour Layover Outlet Visit Timeline
- Minute 0-15: Deplane and store your carry-on luggage at CDS Baggage Services in the terminal to free your hands.
- Minute 15-20: Proceed to the Canada Line platform and purchase a Compass Day Pass from the vending machine. This is your best value for a rapid return trip.
- Minute 20-30: Board the Canada Line train and travel one stop to Templeton Station. The ride is approximately 6 minutes.
- Minute 30-35: Exit Templeton Station and walk 5 minutes to the McArthurGlen Designer Outlet.
- Minute 35-150: You have a maximum of 1 hour and 55 minutes for shopping. Set a hard alarm on your phone for the 150-minute mark.
- Minute 150-165: Walk back to Templeton Station and take the train back to YVR Airport.
- Minute 165-240: Retrieve your luggage, clear airport security, and walk to your departure gate. This leaves a 60-minute buffer before your flight.
Now that you are equipped with the formulas and strategic calculations, your next step is to apply them. Before you arrive, estimate your likely number of transit trips. With this data, you can approach the Compass Vending Machine with confidence, choose the most cost-effective payment method, and ensure your travel budget is spent as wisely as possible.
Frequently Asked Questions on Checking Your Compass Card Balance
Can I check my Compass Card balance on my phone without an app?
Yes. If your card is registered, you can log into your account at compasscard.ca using your phone’s browser. Your balance will be displayed on the main dashboard, though be aware that recent transactions may take up to two hours to appear.
Is there a way to check my balance instantly at the station without waiting in line?
Yes, you can use the ‘Balance Check Tap’ method. Tap your card on any SkyTrain station fare gate reader, and the screen will show your current balance. Immediately tap the card again on the same reader to cancel the tap-in and avoid being charged for a trip.
Are there third-party NFC apps that can read my Compass Card balance?
Some Android users have found success using third-party NFC reader apps, which can read the balance directly from the card’s internal chip. However, these are not officially supported by TransLink and should be used with discretion. This feature is not available on iOS devices.